Showing posts with label #handmade. Show all posts

Tuesday, 13 October 2020

Well, Colour Me Amazed!

The Vintage Black and White is gorgeous. But the Classic Colours kit is also stunning.

Inspired my visits to many English heritage homes where these colours are often seen in damask wallpapers.

Penny Dreadfuls - Damask Classic Colours now in my Etsy store.

Get your kit here.  


Wednesday, 7 October 2020

Penny For Your Thoughts?


New in my Etsy Shop.


Penny Dreadfuls - Damask Vintage Black and White


Check this beautiful kit out here.


Tuesday, 29 September 2020

Stand By Please Ladies and Gentlemen of the Company

 At the end of October I become redundant from my job on the Mary Poppins Musical in London.

September 23rd marked marked a whole year since our first day of fit up. It also marked a whole year since I completed my apprenticeship in technical theatre. I haven't been to work since the 23rd  of March, and won't be returning to work until next year at the earliest. 

I've known about my redundancy since July. It didn't come as a surprise; in fact I probably would have been more shocked if I wasn't to be made redundant. On July 29th I went back into London for the first time since lockdown started. For a city in the middle of summer I couldn't believe how quiet it was. There was so few people around and so little traffic on the roads. The walk from Embankment to Soho is usually a busy one, but I swear that it took half the time it normally would to do that walk. I'm pretty certain that the only people in Soho were delivery drivers for the recently reopened bars and restaurants and other theatre workers like my self going back into the theatres for the same reason I was; to get their personal belonging and tools from their lockers and offices.

I was pretty sad to walk past the main door of the Prince Edward Theatre (current home to Poppins) and see it all boarded up. It was a bit of a harsh reminded that this isn't something that is going to be over quickly, that we were going to be Dark for a while. I think we all had it our heads when this started that the country would be on lockdown for 12 weeks and then we would be back; that by the time July rolled around we would be back stepping in time and flying kites.

This is unfortunately the case for so many people in the arts and entertainment industry. So many people are out of work and many don't even qualify for any financial support. Do you know what I find most frustrating? The number of people that don't work in the entertainment and live arts industry that are of the opinion that what we do isn't a real job, isn't important enough to get government support. It's frustrating and also hilarious. It's hilarious because while they are of that opinion, they are more than happy to spend their days in lockdown bingeing Netflix, Amazon Prime, Disney Plus etc. Who do they think made those TV show and films? In a normal world they are quite happy to spend date night at the theatre with their significant other. I wonder how they'll all feel if the industry that provides relief from their boredom and enjoyable evenings out was to disappear? I suppose its that classic thing of you don't know what you've got until it's gone, but that doesn't help those of us being put out of work now. 

There are some good things that have come out of lockdown. I've probably spoken to my best friend more in the last six months than I have in the last two or three years. I know it sounds bad when put like that but we have that kind of friendship that accepts that we are both busy adults and it gives us more to talk about when we do catch up. (She was also my Press Night Guest when Poppins opened, so she can't say I don't get her anything 😜). I caught up on a lot of TV that I hadn't gotten around to watching, spent more time with my mum, and most importantly have been able to eat my dinner of an actual plate rather than out of Tupperware (it's the little things that count). All that aside I really do miss going to work. I know that I complain at times about the long hours, the six day week, the always working of Bank Holiday weekends, but I genuinely love my job. I love the good days, the long days, the days where anything that can go wrong goes wrong in the most spectacular of fashions. I love my job even though the hours don't really allow for a social life, don't allow for free time, and don't allow for you to forget to do your laundry on your one day off if you want to wear clean socks the following week.

Like so many in the arts that have lost their jobs and have had to turn to other means of income, I have started to do more with my Etsy shop. Although if you have read any of my recent posts you probably would have figured that much out by now. 


 I've got some new kits coming out imminently and I'm also going to do some Christmas stuff. Probably a papers kit and printable gift tags. 

Also if you spend £10 or more in my Etsy shop you can get 20% off your order with the code EMPORIUM10 at the checkout.

I've started a Facebook page for the store as well. Give it a like and or a follow here. 


So keep your eyes peeled for new newness coming soon!!


Thursday, 10 September 2020

How I Made My Disc Journal

News Flash!! Disc binding is the new ring bound.

So I have recently discovered the disc binding system, and I have to say that I really love it. For a start it solves one of I the main issues that I have with my first art journal; the issue cause by the fact that I like to collect things and like to add in acetate pages. This was a problem because it was one of those Kraft Card Spiral Bound scrapbooks from Hobbycraft, so adding pages meant having to unearth the Zutter Punch from the Safe Place Void Of The Universe, and then try to remember how to use it, line all the holes up, Punch the page and then go along and snip into each of the holes. In short, it was a hassle.

Disc binding fixes all of this. Admittedly to get going is a bit of an investment. There's buying the punch, your set of disc, if you're into using planners then that's something else to purchase. (I actually originally heard about Disc binding on a Planner hour on the Hochanda shopping channel.) Planners are not really my thing but I thought that this could be a way to make a really custom art journal. Basically I had been shopping around and couldn't find anything that I liked so I decided to make my own.

This was the result:


Things I Used:

Tools:

Me and My BIG Ideas Create 365 The Happy Planner Punch  I got this on Amazon for £29.95

X Cut curved Corner punch  I already had this in the house but you can get one on Amazon for £8.50 

Discs I also got these on Amazon for £6.93 They ship from China so I had to wait for them.

For the Covers:

2 A3 Sheets of 2mm Greyboard (may also be called Chipboard, who knows anymore?) It's best to shop around for this - Prices may vary.

2 A3 Sheets of 160gsm heavy paper

2 A4 Sheets of 160gsm paper

Book Corners  I got these on eBay. They are £6.93 for 4 and I used 8.

1 sheet of Acetate

Black Construction tape (It's basically really nice black masking tape)

Aleene's Premium Glue Original Tacky Craft Glue  Also got this on Amazon £6.49 for an 8oz Bottle

Strong Double sided tape. (The super sticky red one.)

Tarot Cards These are on a site called Scribd. You'll need to sign up. It comes with a 30 day cancel anytime free trial. I signed up did the whole hand over your Paypal info, downloaded the PDF, and then immediately canceled the subscription. If you forget to cancel it's £9.99 per month. 

(Note: The Tower card on the front cover is from Pinterest. It's originally cream. I put it through some photo software: Affinity Photo to be exact and changed it to black and white.) 

For the Pages:

Pad of A4 Bristol Board airbrush paper £6.01 on Amazon. This is also my normal sketch pad of choice.

Mixed Paper Block This is from The Range and costs £1


So first things firsts I made the cover designs. I do all of my designing on Affinity Designer from Serif.

I set up four Artboards (pages) in my document. Two at 306mm by 202mm and two at the standard A4 size. (The A4 designs will become the inside covers.)

Front Cover. 


Inside Front Cover.


Inside Back Cover.


And Back Cover.


I used the snapshot tool that comes in the Adobe PDF read to cut out the Tarot Cards and paste them into Affinity. Them I faffed around arranging them all into the collage. I found it was useful to pick out my favourite ones that I wanted to see on the top and position them where I wanted them and then it was just a matter of using the rest to fill the gaps underneath. 

I cropped the excess off any of the cards on the spine edges of the Front (left hand side) and Back (right hand side) covers flush to the artboard edge. This is because this edge will line up to the edge of the Greyboard and will not wrap around like on the other 3 edges.

Since the pages of my book are A4 I wanted my cover to be ever so slightly bigger. (This is where I start to waffle a bit, but bare with me)

I opened a new Affinity doc. and created 2 A3 Artboards (pages) one for the Front Cover and one for the Back. I copy and pasted the respective designs onto the artboards. I also added a rectangle (with no fill colour and very light border) over the top that was 25mm wider and 50mm taller than a sheet of A4 that lined up with the spine edge of the design, creating a 25mm border on 3 sides of the design. This was just to be a guide to trim away some of the excess white space once I had printed it out, but still leave enough to wrap the edges of the Greyboard and to glue down. I then printed these on the A3 160gsm heavy paper and printed the Inside Cover designs on the A4 160gsm paper and trimmed the excess away.

With the design sheets to one side, I cut the Greyboard to size. Two pieces 306mm high and 202mm wide.

I then glued the Front cover design to one of the pieces and the Back cover design to the other. 

I found that the best way to do this was to put the glue on the Greyboard and then line up the spine side edge of the printed design sheet to the edge of the board and smooth down. I then cut the corners out of the design sheet so that when the edges are folded over the corner areas don't become bulky. It also helps to keep the corners neat.

Using a pencil I marked 10mm in from the spine edge of the cover. This was what I lined the construction tape up to. I used the tape to wrap the spine edge and create a nice border. I did this on both covers.

Now for the bit that lets us attach our covers to the discs. 

I cut the acetate (comes as an A4 sheet) into 4 long strips. 2 were 30mm wide and 2 were 40mm wide. I then punched these 4 strips with the Happy Planner Punch. 

The punch I have is the same as the one linked further up this post. This is the 9 hole punch and is designed for the Happy Planner Classic size which is 9.25 inches high. and that is what the guide line on the punch are set to line up to. 

Basically to put the holes centrally on the edge of an A4 page you have to do a bit of math and get creative. The math will tell you that you need to measure in from the top or bottom edge 30.half a dozen random numbers but since I don't have laser measure in my eyes I rounded it up to 31mm. This 31mm mark will line up with the guide lines printed on the punch. This does also mean that you the gap at one end is ever so slightly longer/shorter by less than a millimetre. But that is fine as long as you are consistent with what end you measured in 31mm from. So if you measured from the top always measure from the top. The difference may be less than a millimetre but it does notice if you try and put the page in the wrong way up. 

I made a guide out of the spare acetate that I stick (with masking tape) on my punch that I line my paper up to.  

I then cut 15mm off both ends of the 40mm wide strips. This is because these are the pieces that are stuck to the covers and if they stayed the A4 length then I wouldn't have been able to attach the book corners (which are 15mm by 15mm).   

When it came to attaching the acetate to the cover I found and marked where the centre was on both the inside of the cover and on the non-punched edge of the acetate. It was then a bit of trial and error in lining things up so that the where straight. I tacked the acetate down with making tape at first to check the position before committing to sticking it down with Strong Double Sided (red) tape. I repeated on the back cover remembering that there was a top and a bottom to the strip due to all the punch related shenanigans.  

Next it was just a case of gluing the inside cover sheets onto their respective covers. I used the Tacky glue for this. After that I attached the book corners. I had to open up the back clips on the corners a little with a pair of scissors as it was a bit of a squeeze. The scissors, or the flat of the blades at least, were helpful when crimping the corners closed. The backs shown below on the right, curl round on the inside edge, so when you push down hard on them they bite into the covers and that's how they stay attached. 


That's the covers made, now just to punch the paper that will make the pages and start putting everything on the discs. 


I used all of the white sheets from The Range Mixed Block. and half of the Bristol Board Airbrush paper for the white pages. The Mixed Block has White, Kraft and Black sheets in a couple of different paper weight. I used a sheet of the Black card from the mixed block at the front and back of my journal, so all of the other pages sit between these.

This is also where we come back to the two 30mm wide strips of acetate. Where the acetate on the cover was cut down at either end it leaves the corners of the pages exposed. Therefore I added these strips between the covers and the black pages at the front and back; and just for fun I raided my stash of Washi tape to decorate the edges. This was a 20mm wide Washi that I folded around the edge of the acetate.


And that my friends, is how I made my art journal. I hope I haven't waffled to much and that all that actually makes some kind of sense. 

Got any questions or thoughts? I'd love to see them in the comments!

Until next time... Happy crafting!


Friday, 26 May 2017

The Emporium


So you may or may not know that I recently opened an Etsy store. Why the sudden impulse? you may ask. Well it all started a couple of months ago, when I woke up with start at about three in the morning, with my brain running at a hundred miles an hour. You see, I love the Project Life stuff by Becky Higgins, but there tends to be a lot of girly patterns, pastel colours, and pink. And as much as I like the designs, and think they are lovely, they're just not me. What about the Goths and other weird and alternative people out there? I somehow doubt that I'm the only Goth out there that enjoys a bit of crafting or scrapbooking. I think that it's true of most the craft industry, that there is a distinct lack of items that suit the alternative genre to a T. So, with my three in the morning brainstorming session in mind, I decided to do something about that.

So I created my first kit. I know how many people love the Project Life system, especially with it being a way to scrapbook/memory keep even when you are a bit strapped for time, or lack confidence when it comes to being creative. Because of this I designed my kit to work with that system and any future kits will be designed in the same way. Of course you don't have to use them in the Project life system at all if you don't want to. If traditional scrapbooking is more your thing then, by all means, incorporate them into your pages. Truth be known, even though I like a lot of the kits that Project life create, I personally, wouldn't use them with the wallet system, as I prefer tradition scrapbooking or art journals.

I went with Etsy for the store as you can sell digital files. These are downloadable kits that you can either use in digital projects or print them off and use as part of physical pages. It also means that you by once and then can use it as many times as you like, as there is no limit on how many you can print!

I've also got a couple of smaller kits that I'll post here soon for you to download as freebies so keep an eye out for them!

 
This is the main kit that is available in the shop.

This the Occult Gothic Collection (Take a look in store here.)

There are 73 cards in this kit, although you can use them as many times as you like and print out as many as you want, so 73 is the minimum number that you have here. The cards are a mix of 3 inches by 4 inches and 4 inches by 4 inches, with assorted designs, 17 of which are journaling cards.


These are some of my favourite cards from the kit that I have printed out.

I can't wait to dig out some old picture to create some pages with ones.

(Check out my Instagram for close ups.)


I also created  an 8" x 8" paper stack
(Take a look in the store.). They co-ordinate beautifully with the card kit, but would make gorgeous pages on their own.

I decided to go with the 8 inch square pages, because everyone can print an 8" by 8", no matter what printer they have, but not everyone can print 12" by 12".


I'd love for everyone to check out the Etsy shop (It's called The Enigmas Emporium if I haven't already mentioned it), I'd also love to see any of your creations! Tag me on Twitter or Instagram.

Remember to keep your eyes peeled for some freebies on here soon!

Happy scrapping everyone...

Tuesday, 8 September 2015

And The Count Down Begins

R and my self have been working really hard in the +Dead With Tequila Tomb lately, whether we are ready or not the, end is near. In a little over a week and a half R goes off to university, and therefore we have to have everything finished before then. In an ideal world we could do with another couple of months to finish everything off; for no other reason than at the moment we are very stressed out, regularly repeating our new mantra of  "There's not enough time, oh God there's not enough time!"  and have pretty much been working in the tomb morning, noon and night and having dreams that we are still in the Tomb working away.  Have you ever been so stressed and panicked by what you're doing that you no longer no how to do what you're meant to be doing? that's how R and my self have been for the past 3 or 4 weeks and it is horrible.

I'll stop rambling now and start telling you about some really cool stuff from the Tomb.

So we have TEN, yes 10 new collections for you: Edgar Allen Poe, Down The Rabbit Hole, Light Years Away, Dreams Of Darkness, American Dreams, Pocketful Of Posies, The Kraken, Ancient Ruins, Dia De Los Muertos and Pandaemonium.

We are getting RID of postage charges!! (Whooo!!)

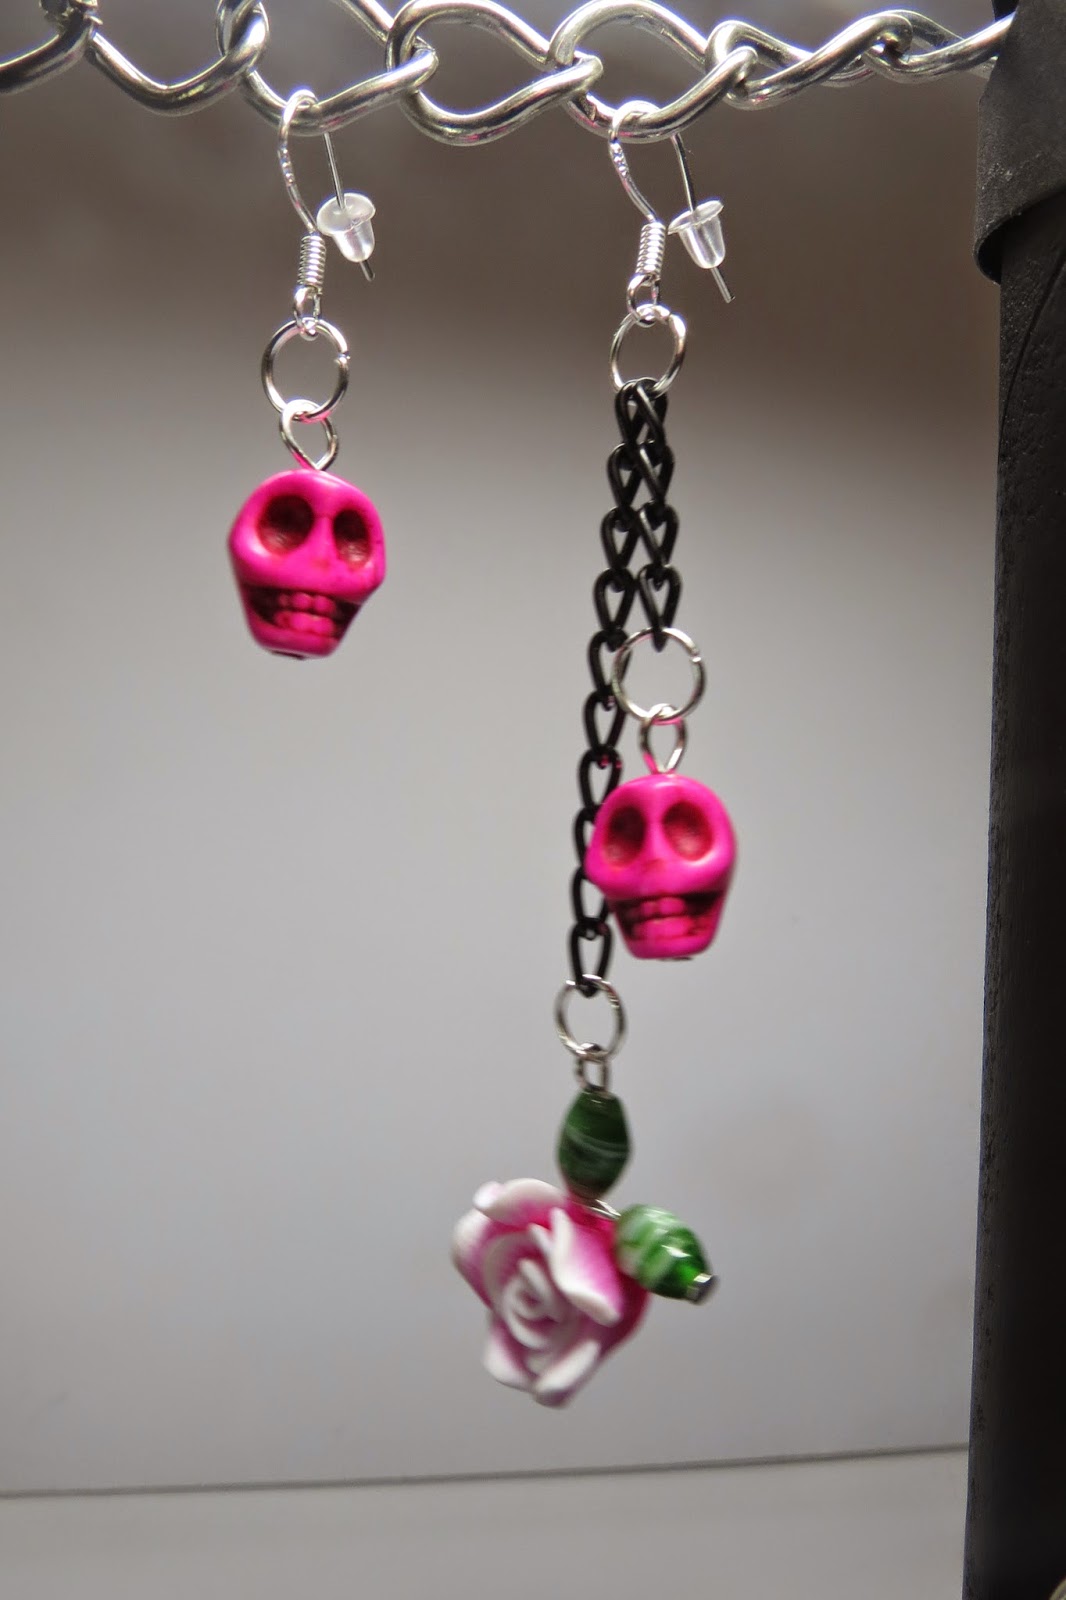
We have got some amazing new necklaces. Where we now have themed collections we ave got some amazing statement charms and things that are gorgeous and we can't wait for you all to see them.

Now for the really exciting stuff!!! We have decided to branch out and offer apparel items in the Dead With Tequila store. If you follow me on Twitter or just occasionally stalk your way through my feed (I don't mind a bit of stalking :-P ) you would have seen this pic that I shared yesterday

  
This is one of our Own Brand items that will soon be available to you from the Dia De Los Muertos Collection. This is the collection that will be the home to all of the Own brand items. 

So basically we have paired with a third party company that make, print, and ship the apparel items as well as the new posters directly from Los Angeles. We have tank tops, hoodies and posters so far.

This does mean that there will be shipping costs attached to the apparel and the new posters because they are the ones that deal with the order and they are the ones that set the shipping costs not us. There will be more info on the shipping costs of these items and size guide and things put on the Dead With Tequila blog site in the FAQ section, that will explain everything so no need to worry.   

Anyways...back to work. I can't wait for you all to see what we have been working on. If you end up reading a product description or something on the Dead With Tequila blog and there are mistakes or missing info, please let me know. the problem with working on something so much is you get so used to it you stop seeing the mistakes, so I'm counting on you guys.

You know the drill questions or comments can be left below, or tweet me, or send a magic carpet, carrier pigeon, flying monkey or unicorn.  

Thursday, 20 August 2015

Heads or tails?

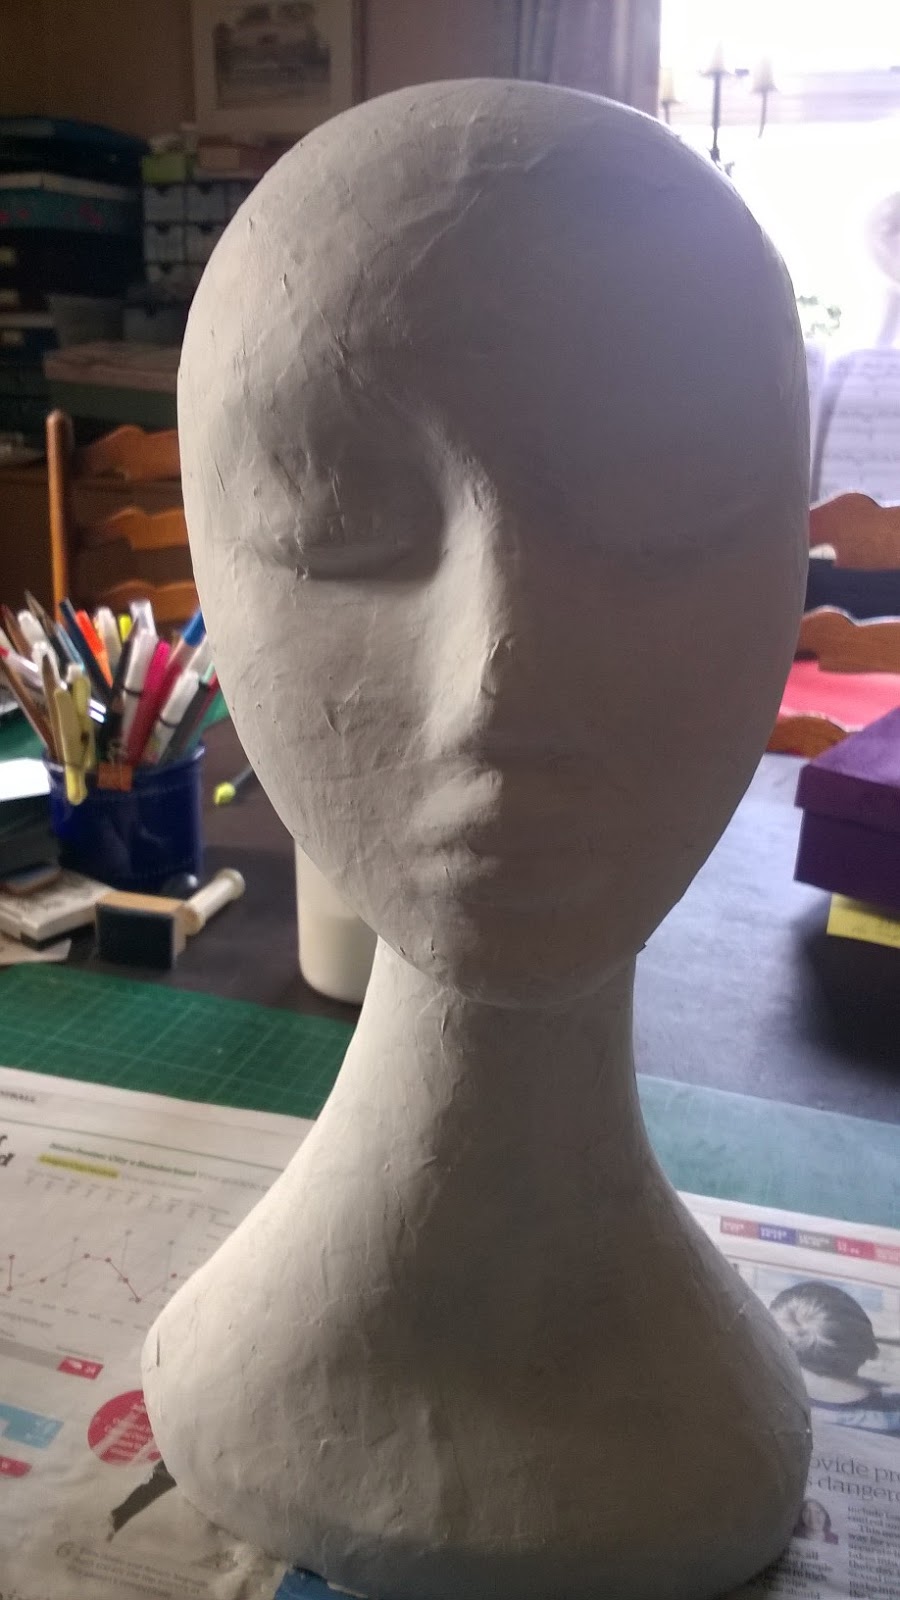
So yesterday in the Tomb we started photographing some of the new collections. As these contain necklaces (yes we're branching out) we needed a way to display these....I came you with this....You don't really see it in the item pics but it makes me feel better knowing that it looks nice.

Here's a step by step/ in progress / stages ......whatever...Basically I took pics as I went along.

From Polystyrene to Paper Mache 

Paper Mache to white primer

Primer to drawing on a design

Designing...

...Designing

...Still designing

...Designing some more
Designing to Painting the coloured areas

...More coloured areas

...Even more coloured areas

...And even more...

...And some more just for good measure
And this is the finished item!!! Just had to do all the really fine black line detail (yay) and fill in the black areas

More detail...Why did I insist on so much detail?

More detail round the back.... A couple of people have said that it makes them think of Harlequin.....But you can make your own mind up there

...More detail again.....yes I like to make my own life hell...

And one form the top.

Tuesday, 11 August 2015

Hi, Just passing through

This is just a flying visit because I'm busy busy busy in the +Dead With Tequila Tomb.

Yes there is a lot of exciting stuff happening in the Tomb right now. We're have spent the last few weeks, especially the past two days working really hard on some awesome new stuff. 

I can confirm that within the last hour and a half we have finished the jewelry part of the Edgar Allan Poe collection!!! (does happy dance). There's some wire bracelets, elasticated bracelets, a couple of bag charms, earrings and...(drum roll please..) NECKLACES!!!!! They are totally gorgeous.. I've already finished a couple of poster designs and a tank top. Yes you read that right, a tank top...as in an item of clothing (Oooo!!) I'm working on even more designs for both t-shirts and posters and maybe even tote bags... I'm just gonna leave you to ponder that for a moment.

The Pandaemonium Collection is coming along nicely as well. Lots and lots of really bold colours paired with black. This is the next one that we are going to aim to finish. Hopefully.... we're waiting for some supplies, but they have to come from a supplier in China so are taking awhile to arrive, which is stressing R and myself out a little bit. If we don't get our stuff with in the next week or so we want to move onto the Down The Rabbit Hole collection. 

Down the Rabbit hole has some nice pieces in already. This is going to have clocks, and playing cards, and dice, some florals. It's going to be a very grown up version of the old story. The teacups are being swapped with martini and shot glasses...Make of that what you will.

The past couple of days have been really busy to say the least. We've started to make multiples of the same item (never more than 10 though) 

There's going to be some updates on how we list stuff in the store as well, but I'll tell you more about that another time..


Anyways...Loves you all, but now I have to dive back into the Tomb or maybe bed. Maybe I'll just sleep in the Tomb...Yeah, that sounds like a plan. 

Laters my lovelies.         

Wednesday, 29 July 2015

It's Dead With Tequila's Birthday

Get 10% off in the store this Friday (July 31) with the discount code shown below!


Monday, 2 March 2015

Take a peek....Dare you.

First things first - I've revamped... Again.....Slightly. The +Dead With Tequila store button that was on the right hand side was bothering my Inner Squirrel (the button was dark blue and really didn't work with the colour scheme) and the Brain Hamster had enough of listening the to whining....So I had to change it. I'm happy with the pages bar though....For now anyway ;)

Now the really important stuff...

Dead With Tequila have added awesome new stuff the the store. There's some cute bag/key charms, quirky earrings and gorgeous new bracelets that I think you'll all gonna love. Check it all out by clicking the "Shop Dead With Tequila" button at the top of the page.


Wednesday, 11 February 2015

Dead With Tequila Valentine's SALE!!!

Don't miss the +Storenvy  Valentine's Sale. You can get 20% off your order.

Runs Friday 13th through to Monday 16th of February.

You can find +Dead With Tequila in the Marketplace Here!


Friday, 21 November 2014

UPDATE: Dead With Tequila

If you have't taken a look at this already then you should so hat you don't miss out.